Summary
Led design of wireframes and mobile iOS app development for a new biosensor that measure blood glucose and ketone levels and is paired through Bluetooth.
Background
What is CGM?
A continuous glucose monitor is a device used for monitoring blood glucose on a continual basis by people with either type I or type II diabetes. A continuous glucose monitor takes a reading on set intervals with a small electrode placed under the skin and held in place by an adhesive.Currently companies like Dexcom, Medtronic and Abbott are the leading CGM manufactures.
At the center of wearable sensors we are on the verge of a new CGM biosensor that would have shorter intervals than any other biosensor in the market today and it will not only track glucose but would also be able to measure Ketone. Under the guidance of Prof. Joseph Wang and Prof. Patrick Mercier my team and I have been able to create a working prototype and are conducting tests.
Role
My role consisted of two parts a UI/UX Designer and iOS UI Developer.
UI/UX Designer
As a designer I led the design of wireframes from sketching to high fidelity prototypes for the iOS mobile app that would be connected to the bluetooth sensor. I also created the brand for the device which consisted of the style guide, logo and other digital assets. All designing was done using Adobe XD, Photoshop and occasionally Illustrator.
Front-End iOS Engineer
As there was only one other developer and I had just completed an iOS bootcamp online (Codepath iOS Bootcamp), I felt I was upto the challenge to help develop the app. So I coded the front-end of the application in Swift and Xcode.
Understanding
My experience working with Dexcom at the Design Lab came in very handy for this project as the lab too was making a continous glucose monitoring sensor.
Compared to my experience with Dexcom the key differences I had to keep in mind was;
- The device not only detects blood glucose but also ketone levels.
- I would not be working on the consumer side of the application but instead on the engineering and developing side.
In order to understand the device and app we were making I met up with electrical engineers , bioengineers, developers and the professors involved in the project.
The current work flow did not consist of a lot of collaboration instead it was an iterative process where the developer would squeeze features in as requested from the engineers and professor.This was not scalable and would lead to a lot of errors therefore I took upon myself to implement design thinking into this project.
Started from the bottom...
I started off by finding what has been accomplished in the project thus far and what needs to be done.
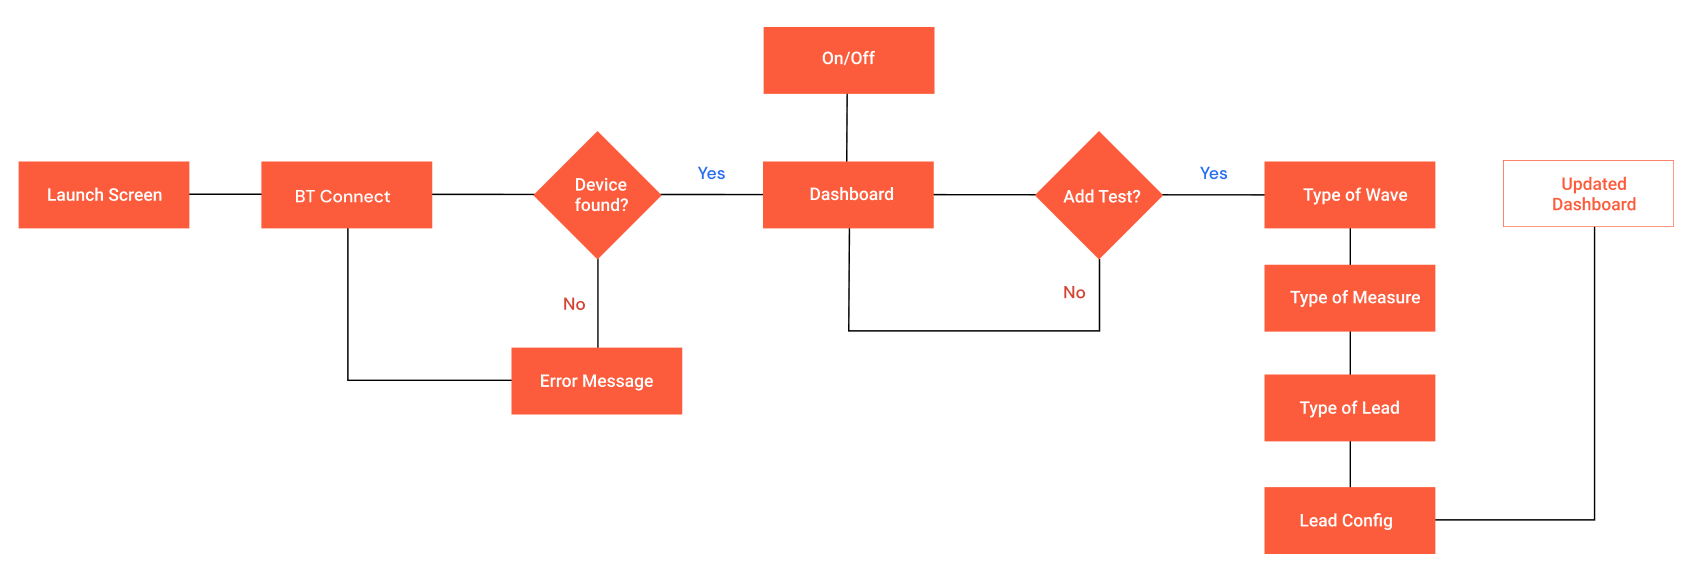
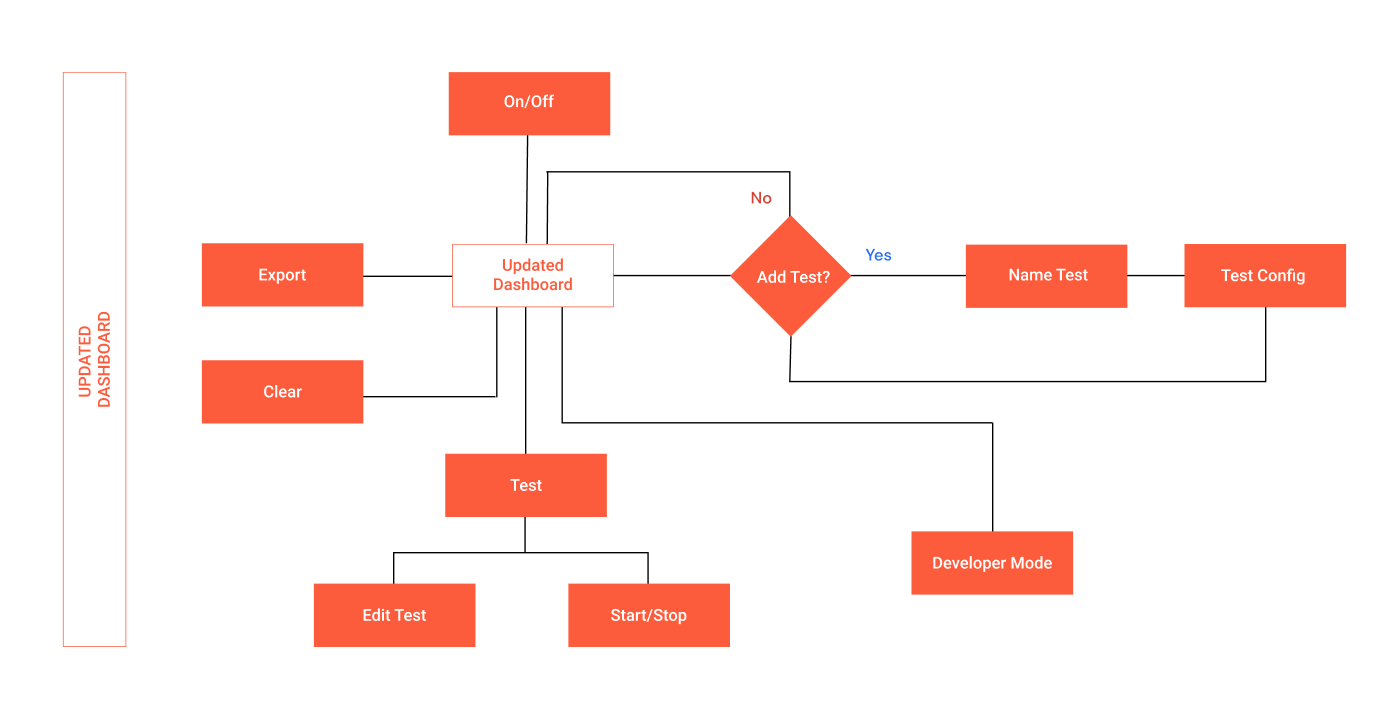
Below was all the developer had completed. He had not got too far therefore it was not to late to implement design thinking. I was also given a funtional requirements document of what the sensor could do which was very useful in creating user flows.

Problem
Cocreating Sessions
In order to better understand what the engineers needed in the app, I encouraged meetings where all stakeholders were present. During our first meeting, I asked the engineers what they would want in the app and we designed the flow of the app together on a white board.
The most important features were:
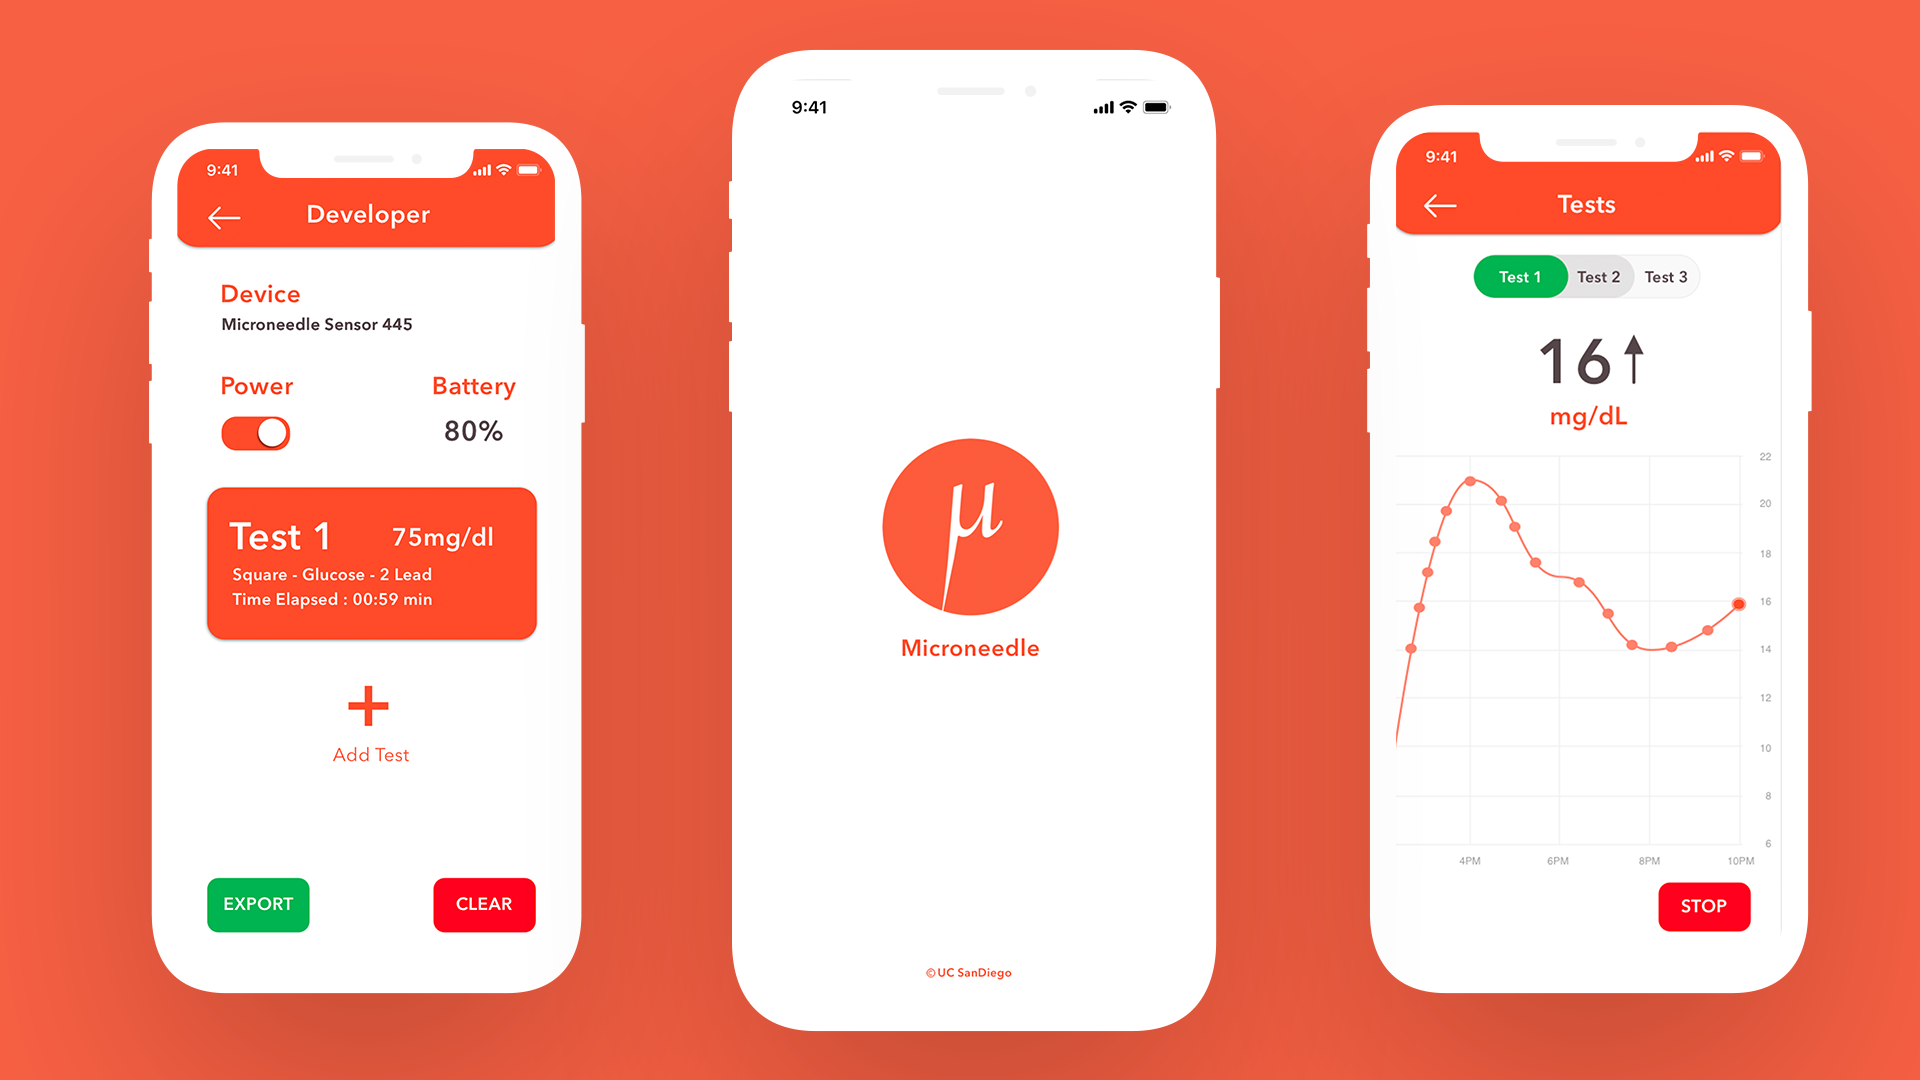
- Connect to device via Bluetooth
- Dashboard (includes Device Battery, Device Name and Power On/Off
- Add a Test (involves selecting Type of Wave,Measure,Lead and the lead configuration
- Graph (Blood glucose level vs Time)
- Export Graph
- Export Graph

Branding
Since the sensor and app would be pitched to potential investors. I took it upon myself to create a logo and branding for the app and device. I create the micro needle by using the greek micro symbol and then stretching out the end from big to tiny to make it look like a needle.

First Polished Prototype
After identifying the flow and creating sketches on paper. I designed the app on Sketch.
Walkthrough of the first prototype

I used a skeuomorphic design here in order to make setting up the device settings intuitive to the engineers.
Iterative Testing
After testing the app with the engineers, developers and professors. I found out that some functions were not available, this included the ability to quickly test the device with preprogammed settings, the ability to run more than one test for an experiment, have not one but two graphs (one with interval of 60s and another with the total time) and ability to name an experiment.

Second Polished Prototype
After understanding the flow a little better. I added some new screens. I also reduced the number of screens for adding a test from having 4 different screens for the type of wave,measure,lead and lead config, to just one screen for everything. This improved efficiency as users didn't have to go back and forth and can edit all the characteristics of the test from one screen.
As I was going to be leaving the team soon. I wanted to make sure edits can be done easily. Therefore I switched to Adobe XD as anyone can use it for free. I also used the iOS design guidelines and elements from the iOS ui kit as they were readiliy available on swift and Xcode and didn't require any additional coding. This was to speed up development.